
How Concealer Blends with Skin for a Natural Look
TL;DR:
- Proper skin prep, shade matching, and gentle patting techniques are essential for concealer to blend seamlessly into skin without appearing cakey. Hydrating dry skin and using light, buildable layers help achieve a natural finish, while selecting formulas with hydrating ingredients aids in smooth application. Seamless blending to the neck and avoiding over-application prevent visible lines and creasing, resulting in a flawless, undetectable coverage.
Concealer looks cakey and obvious on most people not because of the product, but because of how it’s applied. Understanding how concealer blends with skin is the difference between a subtle enhancement and a patch that announces itself. The right technique, combined with proper skin prep and shade matching, gives you coverage that sits flush against your skin instead of sitting on top of it. This guide breaks down every stage of the process so you can stop guessing and start getting it right.
Table of Contents
- Key takeaways
- How concealer blends with skin based on your skin type
- Choosing the right shade and formula
- Step-by-step application for flawless blending
- Advanced tips for smooth skin transitions
- Troubleshooting common blending problems
- My take on technique versus product
- Try Norml4men for effortless daily coverage
- FAQ
Key takeaways
| Point | Details |
|---|---|
| Skin prep matters most | Hydrating and exfoliating before application prevents patchiness and helps concealer bond smoothly. |
| Shade matching is non-negotiable | A concealer even slightly too light or too dark creates an unnatural, mask-like contrast. |
| Thin layers beat one thick one | Building coverage gradually avoids cakiness and keeps the finish looking like skin. |
| Tools change the result | Fingers warm the product, brushes give precision, and sponges create the most natural finish. |
| Setting locks everything in | A light translucent powder after blending prevents creasing and extends wear significantly. |
How concealer blends with skin based on your skin type
No two skin types blend concealer the same way. The surface you’re working with determines how the product sits, moves, and ultimately looks. Skipping this step is why so many people blame the product when the real issue is preparation.
Dry skin tends to grab onto concealer too aggressively. Without moisture in the skin, the product clings to flaky patches and creates an uneven, textured finish. Hydrating before application prevents concealer from clinging to dry spots and produces a much smoother result. Celebrity makeup artist Scott Barnes makes this point clearly: skin prep directly determines whether your makeup looks polished or patchy.
Oily skin creates the opposite challenge. Excess sebum breaks down product and causes it to slide, fade, or separate. A lightweight, oil-free primer applied before concealer gives the product something to grip, which extends wear and reduces the likelihood of it migrating into fine lines or pores.
Here’s what solid skin prep looks like before you open the product:
- Cleanse to remove any oil, sweat, or residue from the surface
- Apply a lightweight moisturizer and give it 60 seconds to absorb fully
- Use a primer if your skin is oily, textured, or you need longer wear
- Exfoliate two to three times a week to prevent dry buildup from disrupting application
Pro Tip: If your skin feels dry but you’re also oily in the T-zone, apply moisturizer only to the drier areas and let the primer handle the rest. Mixing approaches to your specific zones produces a much more balanced result.
Skin texture also affects adherence. Larger pores, acne scarring, or rough patches all interrupt how evenly the product spreads. You can support natural skin recovery over time with better nutrition and hydration habits, which gradually improves the surface you’re working with.
Choosing the right shade and formula
Getting this right is half the battle. A concealer too light or too dark creates unnatural contrast that draws attention to the exact spots you’re trying to hide. The goal is to match your concealer as closely as possible to your skin tone, not to go lighter as a brightening strategy.
Color correcting before concealer is worth understanding. If you’re dealing with redness, a green-tinted corrector neutralizes that discoloration before your skin-toned concealer goes on top. Color correcting before concealer neutralizes underlying discoloration so the concealer on top requires less product to do its job and blends more cleanly.
When it comes to formula, the choice shapes the entire application experience:
| Formula type | Blendability | Best for |
|---|---|---|
| Liquid | High, most forgiving | Dark circles, redness, daily use |
| Cream | Medium, buildable | Blemishes, spots, moderate coverage |
| Stick | Lower, more precise | Spot coverage, quick touch-ups |
Serum-based concealers with hydrating ingredients like hyaluronic acid and peptides offer an advantage beyond coverage. They blur imperfections while actively keeping skin hydrated, which means they tend to blend more naturally and resist the dry, cakey look that heavier formulas produce.
For most people in their 20s and 30s, a liquid formula is the most forgiving starting point. It moves easily, responds well to different tools, and allows you to build coverage without piling on product. The skin tone matching guide from Norml4men offers a practical breakdown of how to find your right shade based on undertone.
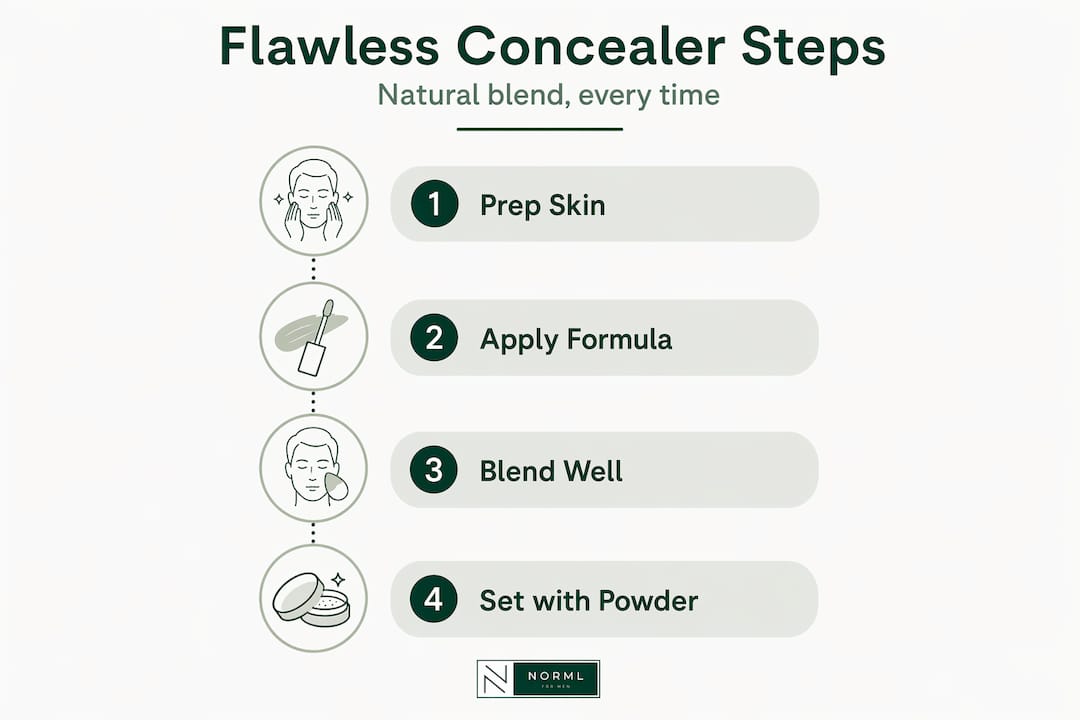
Step-by-step application for flawless blending
Technique is where most people go wrong. The instinct is to apply product and rub it in. That approach almost always creates patchiness, streaks, or a diluted finish that doesn’t cover anything. Here’s the method that actually works:
- Apply a small amount directly to the area you want to cover. Less than you think you need. You can always add more.
- Let it sit for five to ten seconds. Letting concealer emulsify with your skin before blending allows it to adhere more fully and gives denser coverage.
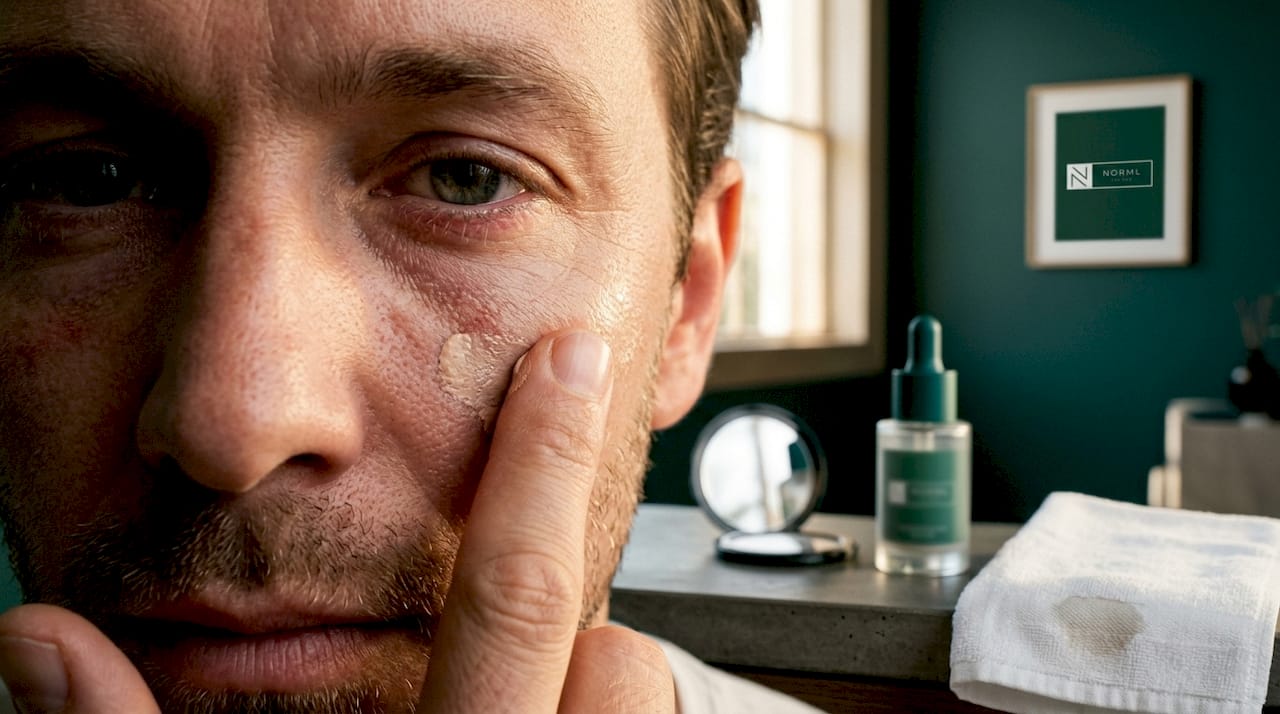
- Pat, do not rub. Use a tapping motion with your finger, a damp sponge, or a synthetic brush to press the product into skin rather than dragging it across.
- Work from the center of the spot outward in small circular motions if using a brush. Thin layering from center outward avoids buildup and creates a finish that looks like skin.
- Build in layers if needed. Let the first layer settle before adding a second. Two thin layers always look better than one thick one.
- Set with powder. Use a translucent or shade-matched powder to lock everything in place.
Your tool choice matters more than most people realize. Fingers are the fastest option and the warmth helps emulsify the product, making it easier to work with. A damp makeup sponge gives the most natural, skin-like finish because it presses product in without lifting it. A synthetic brush delivers precision for small blemishes or tight spots.
Pro Tip: Slightly dampen your sponge before blending. A dry sponge absorbs product. A damp one presses it into the skin. This one change will immediately improve how natural your concealer looks.
Setting concealer with powder seals the product, reduces sliding throughout the day, and significantly cuts down on creasing. A light tap with a fluffy brush is all you need. No packing, no pressing hard.
Advanced tips for smooth skin transitions
Blending concealer well in one spot means nothing if the edges create a visible line where coverage ends. The best-looking results come from seamless transitions between covered and uncovered areas, and between your face and your neck.
Blending product down onto the neck is one of the most overlooked steps. If your face looks noticeably different in tone from your neck, the whole effect reads as artificial. A small amount of product blended along the jawline and onto the neck creates a natural gradation instead of a cutoff line.
Additional tips for cleaner transitions:
- Use a barely-there amount of product at the edges of any covered area and feather it outward gently
- Check your blending in natural lighting, not bathroom lighting. Artificial light hides lines that daylight exposes.
- If you have spots to cover in multiple areas, build a consistent, even skin tone across the whole face rather than treating each area as isolated
- Adjust coverage based on your skin’s undertone. Warm-toned skin benefits from slightly yellow-leaning concealers at the edges to avoid ashy transitions.
Layering is also an advanced tool, not just a beginner one. Strategic spot concealing means applying heavier coverage only where you truly need it and lighter coverage everywhere else. This mimics how real skin looks. Even skin tone does not mean uniform thickness of product.
Troubleshooting common blending problems
Concealer acting up is almost always fixable. The problem is usually upstream from the application itself.
Creasing is the most common complaint. It happens when the skin underneath is dry or when too much product accumulates in fine lines. Skipping hydration and primer causes creasing far more often than the concealer formula itself. Moisturize first, use less product, and set lightly with powder.
Cakiness is a sign of over-application or poor skin prep. If you look in the mirror and the coverage looks textured or heavy, you’ve applied too much in one pass or skipped exfoliation. The fix is to remove the excess with a damp sponge and start with a thinner layer.
Tips to stay ahead of common problems:
- If concealer starts to fade or separate by midday, a light dab of translucent powder refreshes it without adding more coverage
- Never apply fresh concealer directly over old concealer. Blot away the faded product first, then reapply a thin layer.
- If your skin changes seasonally (drier in winter, oilier in summer), adjust your formula choice accordingly. A cream formula that works in July may look dry and flaky in January.
Pro Tip: If concealer creases under your eyes specifically, try applying a thin layer of eye cream first, letting it fully absorb, and then applying a minimal amount of concealer. The crease almost always comes from dryness, not the product.
Knowing when to replace your product matters too. If a formula that used to blend easily is now pulling or separating, it may have oxidized or dried out. Products older than 12 to 18 months often stop performing the way they did when new.
My take on technique versus product
I’ve seen it hundreds of times. Someone buys an expensive concealer expecting it to fix what cheaper options couldn’t, and they get the same cakey result. The product wasn’t the problem. The skin prep and blending technique were.
In my experience, consistently moisturized skin transforms concealer results more than any product upgrade ever will. When the skin underneath is healthy and hydrated, almost any decent formula blends beautifully. When it’s dry, flaky, or un-primed, even premium products fail.
What I’ve learned after years of paying attention to this: start with less product than feels right. The instinct is to apply enough to definitely cover the problem. That instinct produces buildup. Starting with half the amount you think you need and building only if necessary gives you a finish that looks like your actual skin, just better.
The uncomfortable truth is that most people are over-applying and under-blending. The goal isn’t to bury the problem under product. It’s to blend coverage so naturally into your skin that no one can find where it starts or stops. That’s a technique skill, not a buying decision.
— Ford
Try Norml4men for effortless daily coverage
If you’ve nailed your prep and technique but want a product built to work with your skin from the start, Norml4men was designed exactly for this. It’s lightweight, matte, and formulated to blend into skin without looking like makeup.

The Norml All-In-One Concealer covers blemishes, redness, and dark circles in seconds. It sits flush against skin rather than on top of it, which means the blending techniques in this article produce exactly the natural, undetectable finish you’re after. No heavy texture, no obvious coverage, no one knowing. You can also check out the full step-by-step concealer routine to see how Norml fits into a quick daily workflow.
FAQ
How does concealer blend with skin without looking cakey?
Apply concealer in thin layers using a patting motion, not rubbing, and always prep skin with moisturizer first. Cakiness comes from over-application and dry skin underneath, not the product itself.
What is the best concealer for skin blending?
Liquid and serum-based formulas with hydrating ingredients blend most naturally because they move with the skin rather than sitting stiffly on top. Formulas containing hyaluronic acid are especially forgiving for beginners.
How do you match concealer shade to your skin tone?
Test the shade along your jawline in natural lighting. It should disappear into your skin, not lighten or darken it. Match to your foundation shade or your natural skin tone rather than going lighter for a brightening effect.
Why does my concealer crease after blending?
Creasing is almost always caused by skipping hydration or applying too much product in one layer. Moisturize first, use less concealer, and set lightly with translucent powder to stop creasing before it starts.
How do you blend concealer flawlessly into foundation?
Feather the edges of your concealer outward using a damp sponge, blending toward your foundation in light tapping motions. Extend a small amount down to the jawline so there’s no visible line where coverage ends.


